|
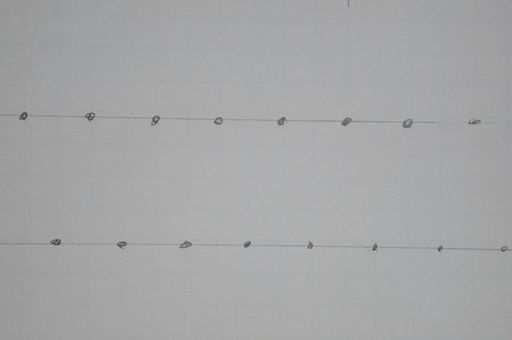
Two parallel lines start things out, marked at regular intervals on each side. Note that the markings are not even with each other, but staggered. This is important, as the knot looks better with each loop balanced by a crossing on the other side.
|
|
|
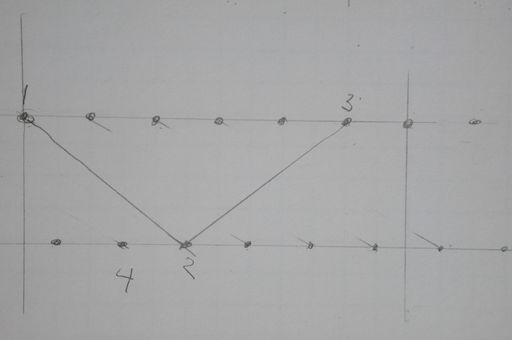
Begin somewhere, of course. This will be more understandable as we proceed. Run a line from the first mark to a mark on the opposite line, two marks over and then some. You could call it "two and a half marks", if you like. It does help if you number the marks, in sequence as you come to them.
|
|
|
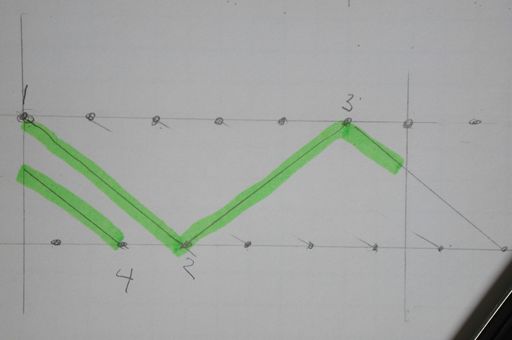
We will arbitrarily choose to make this a knot with six loops around the edge. Any number of loops is possible, but if it is a multiple of five it will turn it into another kind of knot. The vertical lines mark the point at which the knot turns back on itself in three dimensions. Think of those two lines as the points at which the line will disappear behind the hand, and reappear at the other end.
|
|
|
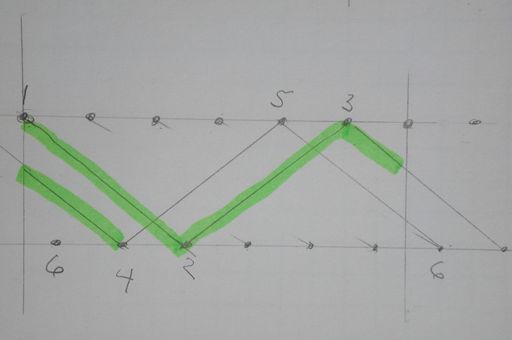
Each time you reach the end (a vertical line) you can extrapolate to the beginning again, as if the paper were rolled into a tube and the two vertical lines are laid one on top of the other.
|
|
|
Now you have to worry about which line goes over the other. Life is short, start by making the second one cross on top of the first -- you'll have to tuck it under on the third pass anyway, why hurry?
|

|
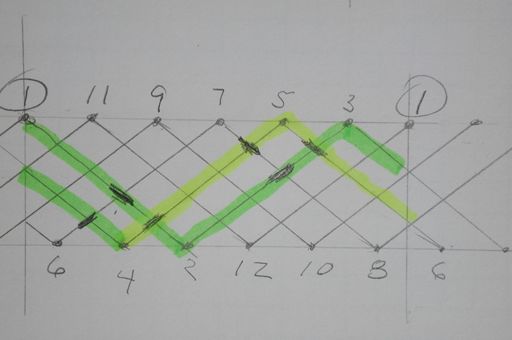
If you make a solid mark in the direction of the line which will be on top, you can see a pattern begin to emerge.
I've numbered all the loops, now, so you can see that it goes around five times and reaches mark number one to complete the pattern.
|
|
|
If you start out with a piece of paper that was wrapped around a cylinder and marked for the proper length (circumference), you can wrap it back around at this point, poke pins into the marks, and start leading string through the same pattern. Eventually you will be able to just arbitrarily tie the same knot without recourse to the printed pattern, as long as you get the right number of pins spaced around the cylinder.
|
|
|
|